Showing posts with label Big Game. Show all posts

Monday, 20 January 2020

40K Scenario - Assault on Sentaku IV


Setting:

Sentaku IV, part of the minor Sentaku system, most noted for being the relay hub for the primary comms for the system fleet navigation. A semi arid world, not suited for agriculture, but not uninhabitable. Generally expanses of rocky deserts, mountainous regions, and large rivers along which the majority of the larger cities can be found. 

Tertia is the largest city on the planet, located at the fork of the primary river LLoy, where the white Lloy and green Lloy converge. Population around 5 million at the last Censosurv reading carried out by Scribes. 

Buildings range from the smaller single person dwelling to the larger administrative buildings hosting the cities governance, naval buildings, navcomm centres and councils, notably the primary archive and records store of the Sentaku system, compactly built into the triangular space afforded by the natural barriers of the rivers on two sides.

Without prior warning or buildup, a Chaos fleet now believed to be led by Lord Skaros dropped into realspace directly within the IV navigation zone and commenced planetfall. Current objectives unknown, but rapid advance towards Tertia through the desert side indicates an aggressive assault to come. 

Local defensive forces have been mobilised to strengthen the city, a distress beacon sent prior to the comms being jammed by the Enemie. We await further news of any reinforcements to come.


Game Type – Open Play. 

No Stratagems or any of that stuff. No turn limit, play till its over or time is up.

- Story and models come first! 
- Points are just a guide!
- Painted only, please!
- Build character, not combos!

Imperium Concepts:

- Think desperate units holding the line. Think falling back into the city street by street when areas become impossible to hold. Think building to building fighting.

Chaos Concepts:

Think forlorn hope. Think storming the barricades. Think raising the flag on the governors palace. Think burning the city and sweeping all before you. Think personal objectives

Forces (Power Level)

Chaos - 100 Primary force, 75 secondary force, 75 tertiary force.
Imperium - 115 + 115 defending forces. Possibly a few extras bits and pieces for flavour 

Terrain Layout

8X6 desert table. 1/3 is the defenders deployment, plus a city set into a sprawling 4X2 section of the table. Densely packed, but with streets and squares. Some entrance routes are big enough for a land raider to get into, but only on main drags. Rhinos could get into others. Some areas are accessible on foot only. Rest of table is desert, with palm trees, rocky outcrops and such. There is cover for the chaos side.

Defenders will be given sandbags, crates, barrels and such, they can place that where they want to locate their defence lines and bolster with cover. Rooftops all free for deployment as well.

Attackers have the rest of the table to deploy into, no closer than 20” to the city at any point. Terrain may not make it possible to get closer in some parts.

Deployment happens at the same time on both sides, both for time reasons and to encourage a bit of fog of war element and not being able to specifically deploy in certain places. The battle plan can be developed on the fly during deployment, if a weak spot appears and the overall commander on each side is quick enough to spot it.

Additional Rules:

Units holding intact buildings get a +2 cover bonus, rather than +1. Grenades thrown into buildings and flamers shot into buildings ignore this cover save.

No flyers

Victory conditions:

Chaos – take the city. They must have overall control of it.
Imperial – hold the line. There may be no relief.

Sub Missions - each player will draw a card and reference the table to be brought on the day. These will be narrative sub missions for each general to undertake if they can.

Monday, 2 December 2019

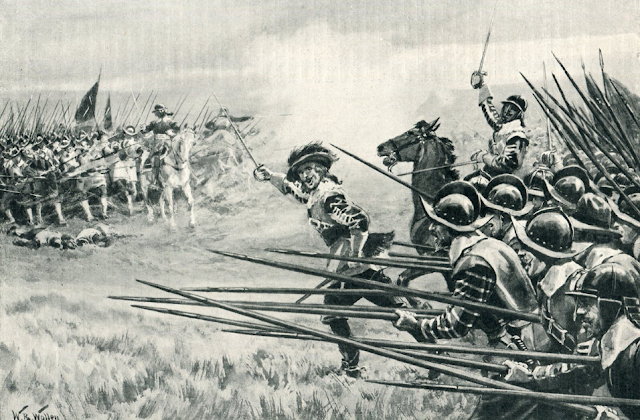
Battle of Naseby


Date: Sunday 8th December 2019, 12.00-18.00
Place: Old Sergeant, Wandsworth.

Table size: 8X6

Objectives

Objectives: Parliament

Defeat the Kings army, secure Parliamentary military dominance in England

Objectives: Royalists

Defeat Fairfax and the New Model Army, secure control of Royal Oxford


Royalists take first turn.

Cavalry brigades will not break unless all regiments in the brigade are shaken.


Deployment

Parliament

NMA to deploy along the southern edge of the table.

Okeys Dragoons may deploy outside of the main line, in advance and off to a flank, if they wish

Skippons Sniper may deploy in advance of the main line, if suitable cover presents itself


Royalist

Royalists to deploy along the northern edge of the table


Orders of Battle - Parliament


Fairfax (CIC Command 9 )

Pike (Standard)
Musket (Standard) - First Fire
Storming Party (Standard) - First Fire
Dragoons (Standard) - Marauder
Medium Cannon

Skippon (Command 8)

Pike (Standard) - Brave
Musket (Standard) - First Fire
Pike (Standard)
Musket (Standard) - First Fire
Commanded Shotte (Large)
Sniper
Light Cannon

Cromwell (Command 9)

Ironsides (Large) - Elite, Stubborn
Ironsides (Standard) - Elite, Stubborn

Ireton (Command 8)

Ironsides (Standard) - Elite, Stubborn


Orders of Battle - Royalist

King Charles I (CIC Command 8)

Pike (Standard) - Elite, Valiant
Musket (Standard) - First Fire
Medium Cannon

Astley (Command 8)

Pike (Standard)
Musket (Standard) - First Fire
Pike (Standard)
Musket (Standard) - First Fire
Storming Party (Standard) - First Fire
Light Horse Cannon

Prince Rupert (Command 9)

Horse (Standard) - Galloper, Ferocious

If a regiment of Prince Rupert horse breaks an enemy on the charge and has a follow up move available, by destroying the enemy charged in a single combat, a command test must be taken at -3.

If failed, the cavalry will gallop straight towards the Parliament baggage camp two full moves, in pursuit of baggage, loot and cheap whores.

If passed, the follow up move can be taken as normal, as Rupert thinks better of it.

Langdale (Command 8)

Horse (Standard)
Horse (Standard)


Tuesday, 30 July 2019

Gettysburg Day 3 - Battle Report

Final day and a big one - Pickett. Madness really, pure madness.

So......Table Setup. This is what they'll be advancing across...............


............and this is where they'll be defending from.


Union left flank

Union centre and right. Lovely stuff.


The full line.


Massed Confederates march up the left flank of the table.


Rebel centre advanced in line.


Left flank Confederates halt at the edge of the fields to check ranges and prepare


Whilst the rest of the line continues the advance.


Union observe as they begin to advance to the road, before crossing in force.


An astonishingly crazy Union regiment decides to march out of the line, straight into the teeth of the enemy..............


and roll a blunder............so CHARGE.


.........ended in a predictable massacre


Confederates begin streaming across the road, with firefights opening up all across the line.


 (that march column is in for it)


Rebel right starts an advance onto the weaker Union flank, causing a real problem and forcing the reserves to be hurried over and any spare unit from anywhere brought over to help.


Confederate left masses in force for the final push


Pour it on, boys!


Centre begins to reach the wall and we've got a fight on our hands.........


The Union left loses some regiments and are forced to pull back hastily.


But, alas, the Confederate centre can't capitalise, the brigade breaks, the blue line holds and its all over suddenly.


Brutal game, absolutely brutal. Very very tough for the Confederacy, but (speaking as commander of the Union left) it didn't feel confident on my side at all. I was having to beg spare units from other brigades be sent over to bolster me!

Def one for a replay and swap sides, I reckon.

So, thats:

Day 1: Confederate win, but bloody draw really. Union fall back in good order
Day 2: Confederate win, fairly comprehensive
Day 3: Union win, solid victory.

Who knows where that leaves history?

Monday, 17 December 2018

The Battle of Scaplehorn Farm

The game described in the scenario here was fought out in full blooded fashion and good humour all round.

Lasted a good 4 hours from opening till conclusion, with war cries given, teeth gnashed and tears of glory or woe, depending on which side of the dice you were on.

All in all, a bit of a classic battle.


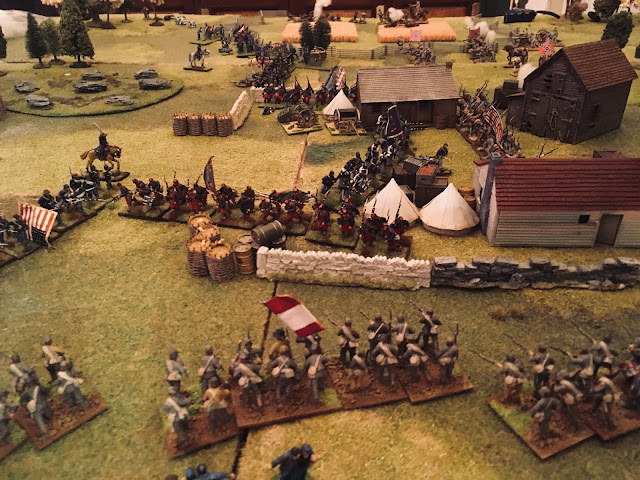
Overview of the table as set up commenced.


The deployments in action were that the 9th Confederate Brigade were stationed in the region of Scaplehorn farm and supply depot, holding until the two relief brigades were coming into the area - although neither the Union nor the 9th knew quite exactly where or when they were going to be turning up.


The Union deployed in a long line, using the full length of the table to attempt to envelope the farm. The general plan being for the central brigade to advance, clear out the 9th and take the farm, whilst the left flank advanced in rapid order, lending support where needed and preparing to stifle the advance of the relief Confederate brigades where possible. The right flank would do much the same, but in a more rapid motion, being cavalry based.


The Union Centre

Union Left Flank

Union Right Flank

The face off.

To say that the opening for the Union was a misfire is an understatement........first roll of the game and Major Bert rolled a classic with a blundered order, making his entire brigade advance a full move to their left flank. He Hearned it!

 errr...............boys, weren't you supposed to be advancing towards the enemy??


The left flank also had trouble with orders and advanced with few units, whilst the right flank moved at a halting pace accordingly.


 Piecemeal advance


Still some time.............


In return, the Confederates opened fire and began to prepare for the inevitable wave that would (eventually) reach them.

It begins.


Eventually, the advance was made and firefights began to break out from all across the line, with a plucky unit of Reb Zouaves putting up a stubborn resistance. Where were the relief columns??

 Sharpshooters doing some work

 Reserve holding back for The Right Moment


 Union Right Flank takes the fencing


A wave of troopers coming at 'em

 Union Zouaves begin to get around the flanks


 Its a massive Zouave off in the centre......


 But can they hold?


Its just a matter of time, no?

Finally, the sound of the Confederates Relief  arrival was heard............except there was only one? Where'd the other one get too? Oh, I see, you split forces to attempt a trap. But wheres........uh oh, is that a blunder roll a I see? Oh well.....next turn then

Reinforcements on the Confederate Left begin to advance onto the table

 Reb Zouaves still holding out in the centre, just.


Here comes the backup on the left! But wheres the other one?

Huge amounts of firefighting erupt all along the lines, with the 9th stubbornly holding onto the farmhouse, the Union right pushing forward to attempt to counter the Reb relief and the Union right attempting to move to counter the expected second relief column, but having a bit of a traffice jam with a distracted Major McDonnell giving confused orders.

 Better late than never, eh?


Confederate left moving up to support the farm. Its all kicking off royally now. 

 Firefight in the centre continues - they just won't shift!

Union begin to make ground

The Confederate left deploy into line and begin a second firefight.

That could spell trouble.......FIYAAH! Only a madman would charge into the middle of that!


Oh.


Well, the Union horse made it through the firestorm, got twatted by endless amounts of cannon fire and then wiped out a couple of cannon, before being wiped from the face of history. Victors, but only in legend.

More and more pressure began to come in from the Confederates and we'd reached the point of the battle when the line begins to sway on both sides and its about who can make the decisive breakthrough. Reserves were deployed. Oaths were muttered. Knuckles were whitened.

Union centre begins to push and take control of the farmhouse

The Reb Zouaves in the centre are finally destroyed, but is it too late?

The Union right begins to crumble before eventually breaking and falling back. A whooping and a hollerin' goes up from the Southerners.

A vicious firefight continues from the Confederate right flank. Now the farm is clear, Union begins to reform to take the fight head on.

 Overview of the centre right from the Rebel view

The large unit of Confederates forms up in the middle to hold the line.

 Confederate skirmishers leap into the gap left by the Zoauves and cause havoc


The ongoing firefight with the Union left continues, with the Union beginning to take more and more casualties.

Union Zouaves leap the wall and take advantage of the cover.

The rebel left flank swings around and takes advantage of the space left open from the retreating brigade, forcing a deployment of the reserves in the centre.


Eventually, the Union casualties began to take toll, units were coming apart piecemeal........the remaining two Union commanders gave each other a look and decided to make a final push to attempt to break the lines once and for all. ACTION OVER INACTION.

Sadly..........and in spite of forcing a few units to retreat in good order, this wasn't enough and the Union found a number of units wiped out in short order, breaking both brigades, leaving the field with a win for the Confederate


 Union left- just Zouaves and ancillary units left. Best pull those cannons back to the rear, gentlemen.

 Union centre...........its all gone. Just the single unit left for a fighting withdrawal.


 Confederates throw hats in the air and make the victorious advance.


 Confederate right.........battered, but not broken. Almost though, almost.

 Confederate centre. Thats what victory looks like.

The Confederate left, at the end. 


CONFEDERATE WIN.


A great game. One for the ages. It was difficult to keep a track of what happened across the full table, mainly due to the amount of actions happening and the ferocity of the fighting (I was in control of the Union left, so had little idea of what was going on over on the right hand side of the field)

Great table, great armies - all painted - great company and a damned good Christmas 2018 game.

Till the next one!